
But they do get more than their share of brake pad dust, road grime, weather and, consequently, rust.

Depending on the age and condition of yours—they always find a way to spring a leak—you may have to replace them for safety's sake. But even brand new, out-of-the-box calipers will start to corrode as soon as you get them installed, if not sooner. That's the nature of the cast-iron beast.
My calipers were in pretty decent condition, albeit covered in surface rust. But leak-free which is a money-saver.
If yours are leaking, do yourself a favor and replace them. If you can afford it, you can get rebuilt units with stainless steel sleeves which will last a very long, trouble-free time.
Most shops and vendors have a core-charge (around $50 per), which means you'll get that amount back when you send them the ones that came off your car.
Needless to say, if your rotors are scored and/or warped, you'll have to have them turned or replaced. By the way, there are shops that have the equipment to do on-vehicle brake rotor machining so you may want to look into that.
The previous owner of my car had the front calipers and rotors replaced at some point. That's good and bad news for me. Good, because they look great. Bad, because they did not replace them with OEM riveted rotors, which was the way these brakes were engineered.
They seem to be in fine shape, and the fact that they are leak-free and in perfect working order, for now, saves me time and money, so all I had to deal with were cosmetic issues.
I started this project by loosening the lug nuts, then raising the car with a 2-Ton low-profile floor jack I recently purchased at Harbor Freight Tools. I used wheel chocks as well as a jack stand for extra safety. I then removed the front wheel.

I visually inspected the brake pads and they have plenty of meat on them. The rotor also looked fine with only some surface rust in the vanes and the hub.


But before I apply rust neutralizer, I like to remove surface rust and dirt so I have a smooth surface to work with.
To achieve that you can use power tools or—like in my case—wire brushes and elbow grease.
I always keep a selection of wire brushes, including stainless steel and brass bristles, in a variety of sizes. You can find them at most hardware stores.
After cleaning both the rotor and caliper, I sprayed the whole assembly with brake cleaner. I used an old towel under the area to catch some of the liquid and debris while protecting my painted floor.

Brake cleaner dries fast, and when the parts were dry, I applied rust neutralizer on the rotor hub and vanes. I used a 1" disposable brush for this.
It is important to note that product directions recommend leaving a layer of rust for the product to work, so my approach contradicts manufacturer's instructions to a certain degree, but I like to remove some of the rust scales in order to have a nice smooth finished surface when the product cures.
This approach has worked well for me, but I wanted to note this in case you want to follow the manufacturer's directions to a tee.

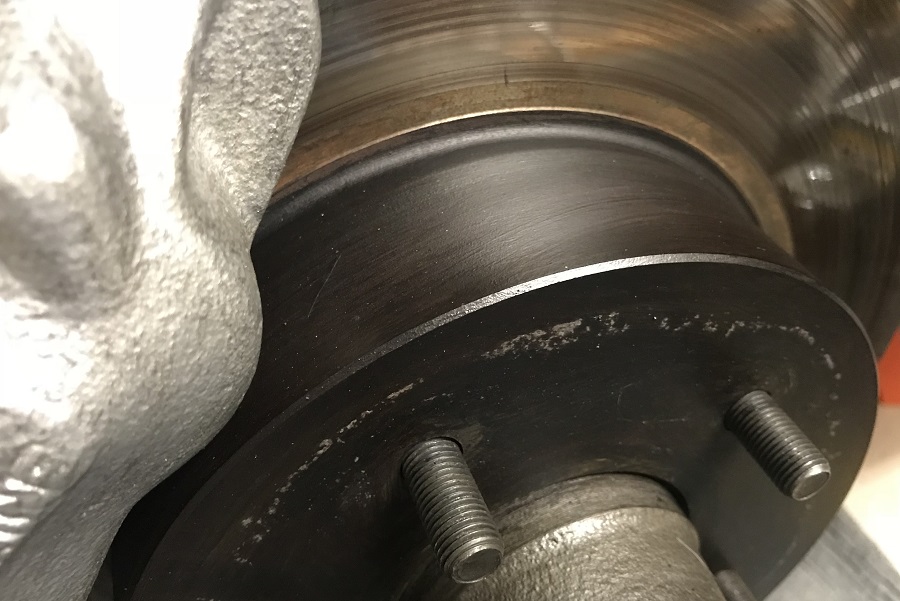
The photo above shows how rust neutralizer leaves a bluish coating as it dries, but it then turns into a gunmetal gray once it's completely cured. Of course, the dark finish looks so much better than surface rust. You can also see how much better the caliper looks after wire brushing. However, if left untreated, it will start rusting right away.
When it comes to caliper paint, the options are many with red caliper paint being the favorite. Rust-Oleum offers a complete kit that allows you to prep and paint four calipers.
I happened to have a spray can of VHT silver paint sitting on the shelf, so I used that. VHT stands for Very High Temperature, which is the kind of paint you need for calipers as they get hot when in use. Besides, I don't see the point of painting the calipers any other color since you can barely see them behind the wheels.
Now, even though I had spray paint, I chose to brush it on using a small artist's brush. The reason being you have far more control using a brush than when masking and spraying the caliper.

I sprayed some paint onto the cap of the can, about four or five squirts at a time, and then took my time to carefully brush the paint on the caliper.
Spray paint is a lot thinner than paint formulated to be brushed onto a surface, so the caliper got at least two coats of paint. It didn't take very long but I did not paint the backside since it is hard to reach.

While the caliper paint was curing, I cleaned the backside of the rim and prepped the hub area for paint since it had a few chips.

The first thing was to remove the center cap, and the best way to do this is to tap it from behind with the handle of a hammer, for example.


One or two taps is all it takes for it to come off. And like most of them out there, mine was a bit loose and that can be a source of rattling noises.

I used a rag soaked in Klean Strip Brush Cleaner, followed by rubbing alcohol on a clean paper towel to get all the brake dust and grime off the rim.
I then made a masking tube out of a couple of pieces of poster paper in order to paint the hub of the rim while preventing overspray.


For painting the hub, I used SEM Landau Black. I am fully aware that it is not intended for this particular purpose, but it works nicely and has just the right sheen.
Of course, you can use whatever paint you want if you decide to paint the hubs of your Kelsey-Hayes wheels.

If you use my approach, you will need to hold the masking tube as you spray the paint. But if you make it the right size, there will be no overspray to deal with.
This method is, in my opinion, the easiest, cleanest, and fastest way to paint the rim hubs. I've used the masking tape approach before and it takes forever.


I considered using aluminum tape, but paper masking tape works just fine and can be removed and replaced as needed without much if any residue left behind.
To reinstall the center cap all you need to do is position it, then give it a couple good whacks with the heel of your hand. In extreme cases, a rubber mallet will do the trick.
These things are made out of plastic so you have to be gentle with them as it does not take much to mar or crack them.

To trim the urethane I used masking tape to have a surface where I could mark the portion that was to be removed.
I did not want to cut a lot off and, based on what I saw when I turned the wheels, I guessed how much I would have to remove in order to avoid any tire rubbing against the air dam extension.
To cut the material I used a cutting wheel on my Dremel tool, which is a must-have tool for do-it-yourselfers. Safety glasses and a respirator or mask are mandatory.
As careful as I tried to be, at one point the cutting wheel jammed and shattered, and you don't want to risk injury by failing to wear safety glasses.

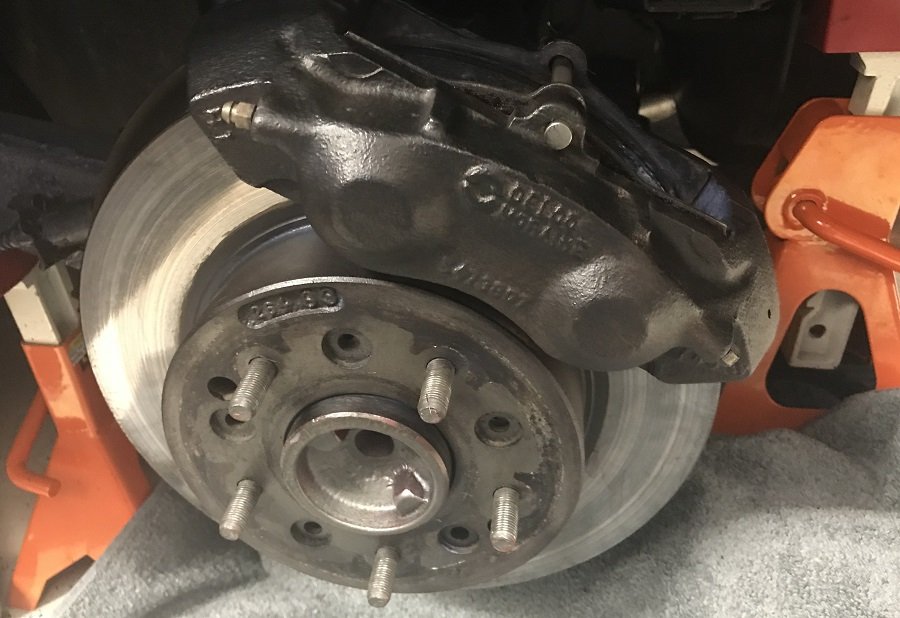
And here's the finished caliper and hub. It looks great and it should stay protected from the elements for a long time. I was going to add a thin layer of grease to the hub in order to prevent galvanic corrosion between it and the rim, but in my haste to be done, I completely forgot.

As the photo below illustrates, the Loctite Rust Neutralizer does an amazing job of not only getting rid of the surface rust but also giving the part a great finish.
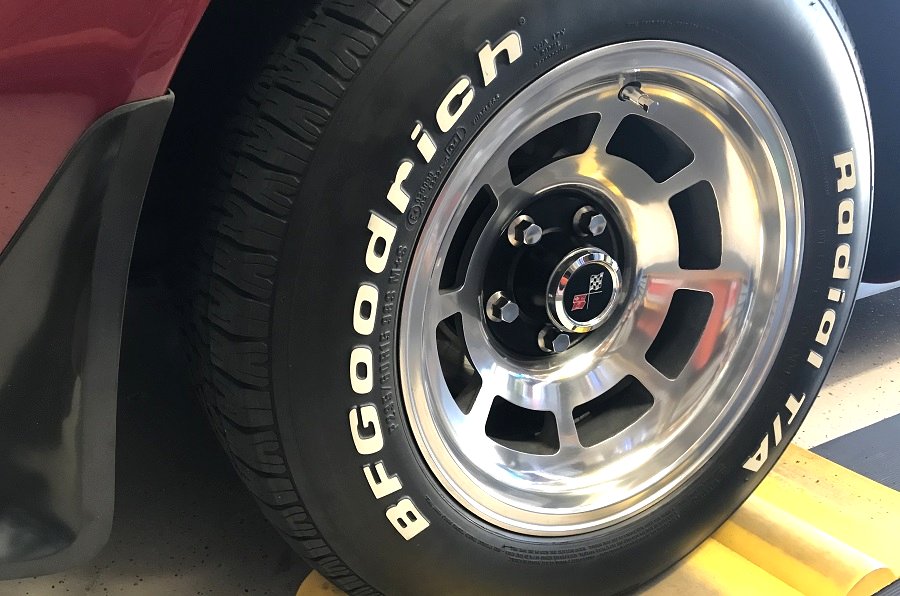
And here's the wheel back on the car. It is now clean inside and out and, best of all, no more paint chips or rattles.

Last-Minute Notes:
As I was working on the LH side rear caliper, I decided to apply a coat of Extend Rust Neutralizer to it, since I thought it would serve as an additional layer of protection, even though it is not intended as a caliper primer, but I figured I would try it just the same, hence the light layer of rust I left, which is recommended by Loctite.
Long story short, I really like the way the caliper turned out with the rust neutralizer. It is almost black but it looks really good in my opinion so I decided to stop there and come back in a month or two to see how it fares.


Frankly, I wish I had thought of this before I did the front caliper since I really like how it looks with the dark cast-like finish. My plan now is to do the rear calipers with the rust neutralizer and the front ones in silver.

The rear wheel also was detailed and the center received a couple of coats of SEM paint.
I hope this article is helpful to you if you need or want to detail and paint your C3's calipers.
Thank you for following my '76 Vette Blog!
Product Links... (#sponsored)
• Loctite Extend Rust Neutralizer
• Wire Brush Set: Brass, Stainless Steel | 3-Piece
• 1-Inch Chip Bristle Disposable Paint Brush
• CRC Brakleen Chlorine-Free Brake Parts Cleaner
• VHT Cast Aluminum Spray Brake Caliper Hi-Temp Paint
• Rust-Oleum Automotive Caliper Paint Kit | Red | Part No. 257169
• Klean Strip Brush Cleaner
• SEM Landau Black Color Coat (12 oz.) | Part No. 15013
• Dremel 7700-1/15 MultiPro 7.2-Volt Cordless Rotary Tool
Calipers, Brake Pads, Rotors, etc.
As far as I know, calipers and brake pads are the same for all 1965-1982 models.
• Front Passenger Side Disc Brake Caliper | ACDelco Part No. 18FR816
• Front Driver Side Disc Brake Caliper | ACDelco Part No. 18FR817
• Rear Passenger Side Disc Brake Caliper | ACDelco Part No. 18FR818
• Rear Driver Side Disc Brake Caliper | ACDelco Part No. 18FR819
• Front or Rear Disc Brake Pad Set (Organic) | ACDelco Part No. 17D8
• Dorman Corvette Brake Caliper Repair Kit | Part No. D46455
• Dorman Corvette Brake Caliper Piston | Part No.P7515A
• Front Disc Brake Rotor Assembly | ACDelco Part No. 18A102
• Rear Disc Brake Rotor Assembly | ACDelco Part No. 18A101
