

The previous owner had done a "rattle can restoration" of the whole area, in what I believe was an ill-fated attempt to make things look better.
The whole area was a disaster when you take into account years of road grime, primer and paint overspray from a color change, in addition to layers of flat black spray paint.
Rubber hoses can be cleaned provided they are pliable and free of cuts or pinholes.
But actuator cans need a little more than just a cleaning, and in extreme cases, replacing the parts with new units is the only viable solution.
My actuators were okay structurally, for the most part, and fully operational, so refurbishing was the option I chose for monetary reasons and because I am not pursuing NCRS certification.

Unfortunately, the cleaning process takes a lot longer when someone chooses to cover an area with layers of whatever spray paint they happened to have handy. And like I stated in my previous article, I plan to use aerosol paints, but will do so correctly.
By "correctly" I mean removing the parts I will be refurbishing so they can be inspected thoroughly, repaired as needed, cleaned and prepped, then painted—again, properly—so they look good.
So let's get this project underway!
There is a way to safely remove the actuators without the need of removing the hood. I saw this approach demonstrated by The Corvette Ben on YouTube and it works great.
You will need an adjustable extension pole which—if you don't have one already—you can get from Lowe's, The Home Depot, ACE Hardware, or Walmart. I have a couple at home and used an aluminum pole that looked strong enough to keep the hood open for a few days without issue.

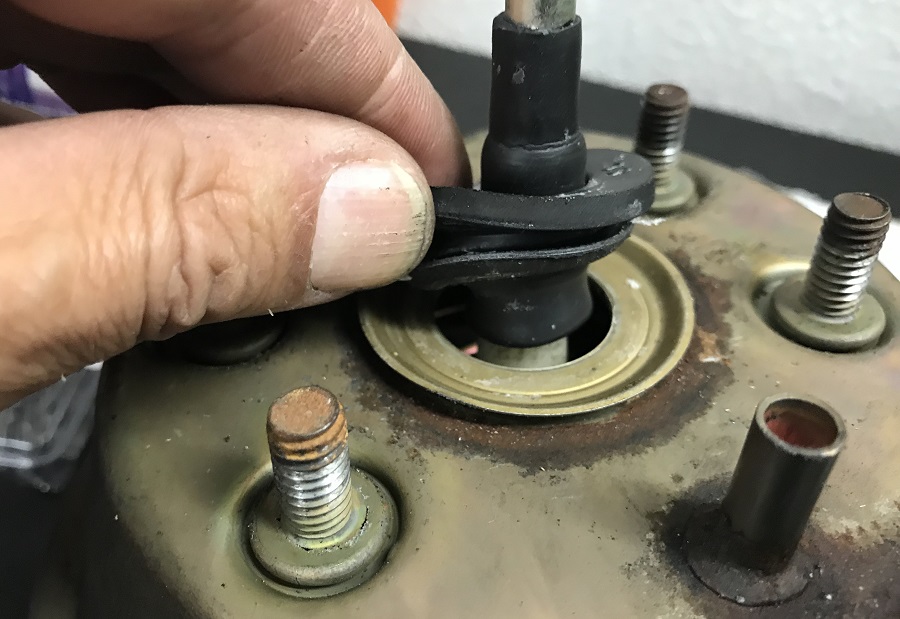
You will need to disconnect the prop-up hood hinge (red arrows) so you can increase the opening between the hood's front edge and the front clip. This allows you to safely, one hopes, remove the actuators without having to completely take the headlamp assemblies off the car.

Since I usually work alone, I used the pole to hold the hood open as I disconnected the two bolts that secure the prop-up hinge to the hood.
At this point, you are able to push the hood a few inches farther which gives you enough room to carefully (and barely) maneuver the actuators out of the car. I extended and locked the pole, then made sure that the handle was resting securely in the wiper bay, and the tip nested in the driver's side hood latch plate. I used rags to prevent scratches.
I also rolled my car up on the RhinoRamps I bought recently. This made access to the headlamp assemblies from under the Vette a lot easier. And I removed the grilles for better access to a couple of the nuts that secure the actuators to the assemblies.
You will need standard sockets, extension bars, ideally a swivel socket adapter, ratchet, and a breaker bar. A couple of the nuts are partially blocked by the housing so it can be a bit of a PITA to get them to come out, but it is doable.
Having the front of the car raised a bit helps tremendously. And even though the RhinoRamps can handle the weight of a C3 just fine, I like to use a couple of jack stands under the frame of the car just to be extra safe. I also chocked the rear tires.


In order to remove the actuators, you start by releasing the springs that are hooked to the ends of the clevis pin. The pin is secured in place by a cotter pin. You can then push it out in order to free the actuator rod clevis from the assembly (see red arrow in the photo below). There are a couple of plastic bushing sleeves at each end where the pin rides up and down, so make sure you take them out also in order to clean and inspect them.


I am sure at some point they fatigue due to use and/or corrosion and one of the ends breaks. That's all it takes for the rest of the spring to fall off.
Mine are looking pretty tired after all these years so I went ahead and ordered two sets from an eBay seller, who had the best price around.
In the meantime, I cleaned all the parts and even gave the original spring a light sanding and a coat of cast paint.
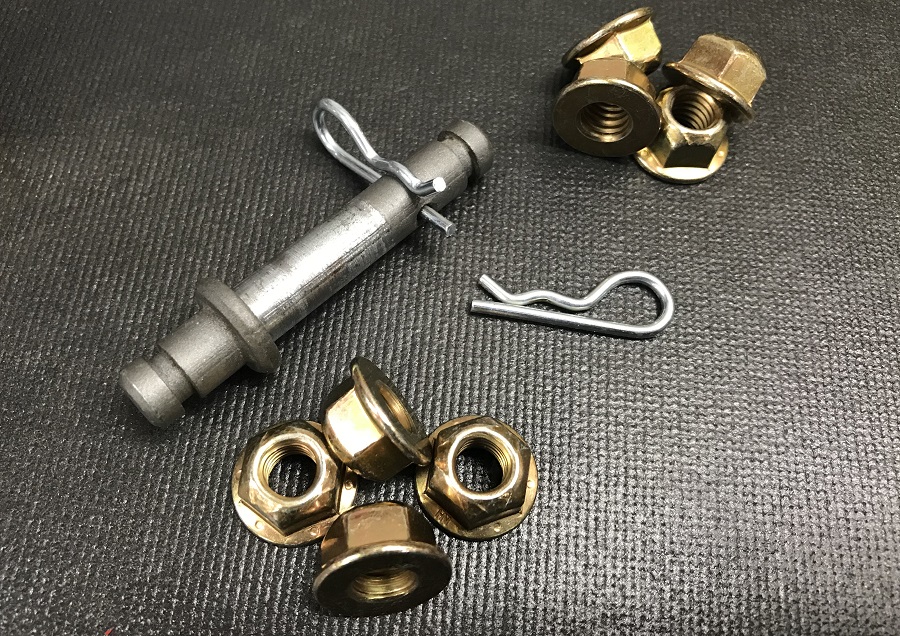
I also stopped by the local ACE Hardware store to pick up a couple of things to freshen things up as I reassemble them. I bought locking nuts as well as spring locking pins. Those will make installation and removal of those pieces a lot easier versus having to deal with traditional cotter pins.
After taking the seal and gaiter boot off the actuator I've been working on, I decided to reuse them as they are in fine shape. I guess I could've replaced the dust gaiter boot but it looked just fine after I washed it so I will reuse it.
The boot comes off pretty easily, but the seal takes a bit of work since it's secured in place by a metal lock ring. I carefully pried one of the three "ears" and the ring just sort of popped off. I will bend that one back when I put the whole thing back together, so it keeps the seal tightly in place.
By the way, I counted the number of turns it took to get the clevis off the rod (14½ for this one). This way I will be able to reinstall it in the exact same position. It received a coat of cast paint after I cleaned it.

The gaiter dust boot slides right off and it's there to protect the pushrod and keep grime out of the actuator.

I tested the vacuum before I removed the seal, and everything checked out. Actually, other than a little bit of surface rust, everything appears to be in fine shape.

I carefully pried one of the tabs (red arrow) with a small flat screwdriver and the seal lock ring popped right off. A little clamping with needle-nose pliers will help secure it in place when I reinstall it.

This is the seal lock ring viewed from the other side. Be extra careful when prying it off the housing to avoid any potential damage to the rubber seal.

The seal also has a bottom lip that seals from inside the actuator. Again, be extra careful when removing and then reinstalling it. It may not be a bad idea to use a dab of silicone grease to keep the seal conditioned and help extend its life.
After dry sanding and cleaning the actuator to the best of my abilities, I used Rust-Oleum® Hammered paint since it will help prevent rust and it also helps conceal some of the surface imperfections.
So far I am very pleased with the finish. I used a black/gun-metal hue. I think they're going to look great once they're back in the car.

After masking areas I did not want to be painted, I gave the actuator several coats of paint and allowed it to dry overnight.


And here it is. Ready to go back in the car. And even though it's not factory correct, I don't care. It looks and works great.

Reinstallation is the reverse of the procedure described earlier, and everything went back together quite easily. However, after testing the operation of the driver's side headlamp, it was not closing completely. I suspected the actuator rod end clevis, even though I made sure I gave it 14½ turns per my notes.


One thing that I did not care for was how one of the actuator vacuum lines was installed. It sat right on top of the actuator and the hood rubbed it every time I opened and closed it. A quick trip to AutoZone provided a piece of vacuum line and plastic connectors. This allowed me to elongate the hose so I could route it better.
BEFORE:

AFTER:

Things went a lot faster when I did the other side. But before securing the clevis pin, I tested the headlight assembly operation to ensure it closed all the way. In this case, though, the 12 turns I counted during disassembly proved to be spot on, so I installed the plastic bushings, washer, spring lock pin, and the springs.


And this is how I stretched the springs in order to hook them to the pin. I used locking pliers and locked the jaws to one of the corners of the spring. This allowed me to stretch the spring enough to clear the pin so I could hook it into the groove.

This is one of those jobs that any do-it-yourselfer can do at home in a couple of days. If you have a pro do this, expect to spend hundreds of dollars and be without your car for several days. Might as well save the money and aggravation and do it yourself.

One last thing... I did receive the actuator springs and installed them. But one thing I failed to realize was that the top (or outer) springs are totally different and I did not order those, so keep that in mind is you need to replace all the actuator springs.


Anyway, I am super happy how this project turned out. It looks a thousand times better than before, everything works fine, and the only money I spent was on two sets of new springs, plus the eight nuts and spring locking pins I bought at the hardware store. Roughly around forty bucks.

Thank you for following my blog!
Product Links... (#sponsored)
• Rust-Oleum 7215830 Hammered Metal Finish Spray, Black, 12-Ounce
• 1968-1982 Corvette Headlamp Actuator Boot
• 1968-1982 Corvette Headlight Actuator Rear Link Pin Insert (Plastic)
• Corvette Headlight Housing Actuator Link Spring (Inner Spring)
• Corvette Headlight Housing Spring (Outer Spring)
• 1968-1982 Corvette Headlight Actuator Chrome Covers
• 1968-1982 Corvette Headlight Actuator with Boot & Seal | Left Side
• 1968-1982 Corvette Headlight Actuator with Boot & Seal | Right Side
