In the case of the gas tank door, it's an easy project that should not take more than an hour to do, provided all the components are there and in working condition. Tools required are a Phillips screwdriver, a car finish cleaner, wax, chrome polish, and clean microfiber rags.
I started by assessing the area and as the photos below show, you can see where dirt and wax have accumulated, plus the area indicated by the blue arrow below, where the paint was chipped.
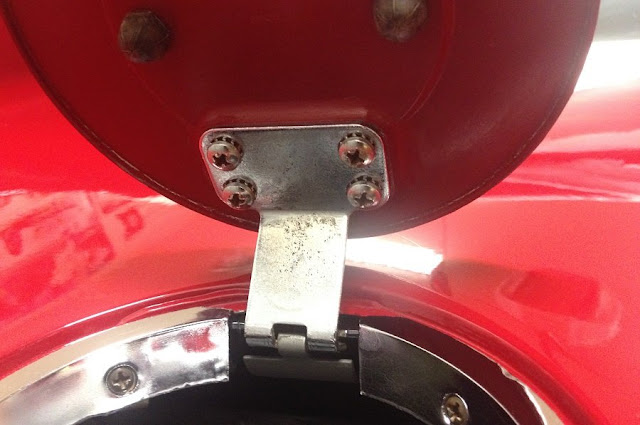
It is easy to see where the door hinge has surface rust and pitting. Of course, there's only so much that steel wool will remove, but I've found that #00 or #0000 steel wool is the best product to remove surface rust from chrome or polished surfaces.
And I usually combine it with chrome polish which works really well.
Grooves and crevices (blue arrow below), are ideal places for dirt and wax buildup to accumulate. In order to clean it properly, the only option is to remove the gas door and bezel off of the car. That way you can reach in that recess and get all that gunk out.
Once it's clean, you can polish and wax everything.
Removing the gas door and bezel is as easy as unscrewing four Phillip-head sheet metal screws, which secure the bezel to the body with U speed nuts.
The door is secured to the chrome bezel by four Phillips-head screws. Also, note the two acorn-type speed nuts that secure the emblem to the door. I chose not to remove the emblem since the area around it was clean.
Since I wanted to paint the spring, I removed it and—after cleaning it—I gave it a couple of coats of cast paint. Also, by removing it, I had easier access to the hinge since I wanted to clean it the best I could. I also carefully removed the three rubber bumpers which I replaced at the end.
Next, I removed the four Phillips-head screws that secure the gas door to the bezel. The painters gave them a coat of red paint when they spayed the car years ago when the second owner had the color changed from silver to red.
I used a brass brush to remove the paint which came off easily. Otherwise, I would've bought new stainless steel screws from the hardware store, but fortunately, that was not necessary.
As previously mentioned, I painted the spring and reattached the door to the bezel, after I cleaned the chrome with #0000 steel wool and then polished it with Mothers Chrome Polish.
I was unable to remove all the pitting from the hinge, but it cleaned up fairly well for a forty-year-old part.
And here's the gas door and bezel ready to be reinstalled on the rear deck of the car. The "Unleaded Fuel Only" decal edges collect wax buildup and "frame" the sticker with a thin dirty edge. Unfortunately, there's nothing you can do to fix that.
This closeup angle shows some of the pitting on the hinge, but other than that it is clean and fully functional. I am sure someone offers repro hinges, but in this case, I am willing to live with the aged part which really looks perfectly fine once it's back in place.
I also cleaned the sheet metal screws that secure the bezel to the body, and then reinstalled the assembly after I polished and waxed the recess.
To me, painted hardware (that is not supposed to be painted), looks bad, so spending a few minutes cleaning the screws was time well spent.
And here's the finished product. I used touch-up paint on the recess and it looks a lot better. Plus the whole assembly is now clean and looks great.
Again, I spent about an hour detailing this assembly and am very pleased with the results. Plus, it's been my experience that a lot of people tend to notice those little details, which help freshen the overall look of the car.
Thanks for following my '76 Vette Blog!
Product Links... (#sponsored)
• How to Restore Your C3 Corvette: 1968-1982
• 1968-1982 Corvette Restoration Guide, 2nd Edition
• Corvette Black Book | 1953-2019
• 1976 Corvette Service & Overhaul Manual
• 1976 Corvette Service & Overhaul Manual CD-ROM
• 1976 Corvette Dealer Sales Brochure | GM-Licensed Reprint
• 1976 Corvette Stingray Owner's Manual | GM-Licensed Reprint
• 1976 Corvette Assembly Manual


